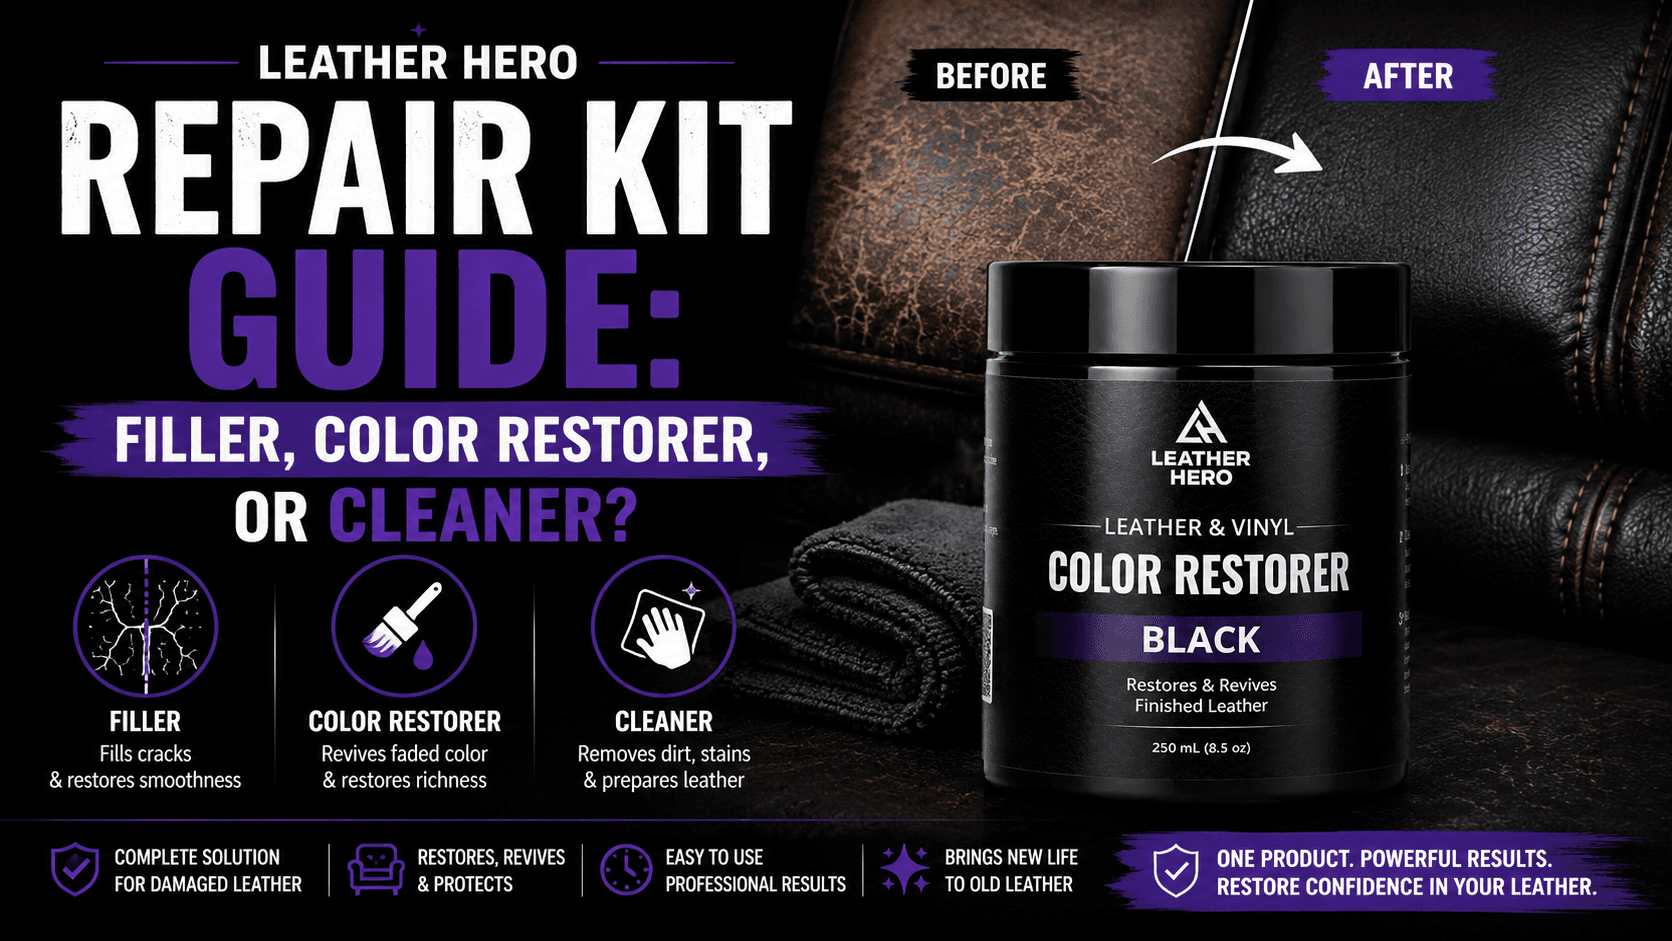
Leather Hero Repair Kit Guide: Filler, Color Restorer, or Cleaner?
When people search for a leather repair kit, they may be dealing with very different problems. One person has a faded couch arm. Another has a scuffed shoe toe. Another has a cracked car-seat bolster or a handbag edge with missing finish. Those problems do not all need the same product.
This guide explains how to choose between cleaner, leather filler, color restorer, and top coat so your repair looks more natural and lasts longer.
Use cleaner when leather is dirty, dull, oily, or cloudy but not physically damaged.
Use leather filler or repair paste when the surface has scratches, cracks, gouges, missing finish, or areas that feel uneven.
Use color restorer after repair when the surface is smooth but the color needs to be blended back in.
Use top coat after repair and recoloring on high-use areas to protect the finish.
Restoration Flow
Clean first
Fill physical damage
Restore color
Seal the repair
Start by Identifying the Damage
Run your hand lightly over the damaged area. If it feels smooth but looks faded, scuffed, or pale, the problem is mostly color loss. If your fingernail catches on a crack, gouge, peeling edge, or missing surface, the problem is physical damage and should be repaired before color is applied.
This simple test prevents a common mistake: trying to fix texture with color. Color can make a worn area less visible, but it cannot rebuild missing material. A leather repair kit with filler or paste is the better first step when the surface itself is uneven.
When Cleaning Is Enough
Some leather looks damaged because it is covered with body oil, dust, old conditioner, denim transfer, or residue from household cleaners. Before using filler or color, clean the surface with a leather-safe cleaner and let it dry. You may find that the leather only needed a proper cleaning routine.
Cleaning is also required before any repair product. Filler, color restorer, and top coat all perform better when they are applied to a clean surface instead of a layer of grime.
When to Use Leather Filler
Use leather filler for scratches, small cracks, worn edges, gouges, and areas where finish or material is missing. Apply it in controlled layers and smooth the repair as directed. The goal is to level the surface so color can blend across it instead of highlighting the damage.
Filler is especially useful on car-seat bolsters, couch arms, ottomans, shoe toes, and bag corners because these areas get repeated friction. After the filler cures and the surface is smooth, use color restorer to match the surrounding leather.
When to Use Color Restorer
Color restorer belongs after cleaning and after any needed filler work. Use it when the repair area is smooth but visually lighter, gray, scratched, or uneven. Apply thin coats and feather beyond the damaged area so the repair blends naturally.
If the item gets heavy use, finish the repair with top coat. This helps protect the restored color and makes the repair easier to maintain.
Repair Examples by Leather Item
A leather couch arm often needs cleaning first because skin oil and dust collect exactly where the arm is touched. If the color is faded but the surface is smooth, color restorer may be enough. If the arm has rough cracks, filler should come before color. A car-seat bolster is similar, but it usually gets more friction from clothing, so top coat becomes especially important after the repair.
Shoes, boots, and bags need a lighter touch because small areas can become obvious if product is applied too heavily. A scuffed shoe toe may need cleaning, a thin layer of color restorer, and buffing. A bag corner with missing finish may need a small filler repair before color. A steering wheel should be treated carefully because it is touched constantly and any sticky or heavy finish will be noticeable.
How to Avoid Making the Damage Worse
Avoid household cleaners, bleach, alcohol-heavy products, abrasive pads, and heavy oil treatments when you are preparing a repair. These can dry leather, strip finish unevenly, or leave residue that interferes with filler and color. Leather repair is easier when the surface is clean and stable, not over-scrubbed or saturated.
Work in small sections and let each layer dry. If filler is applied too thickly, it can shrink, crack, or remain uneven. If color is applied before filler cures, the repair can look cloudy or textured. If top coat is applied over uncured color, it can trap moisture or affect durability. Patience is part of the repair process.
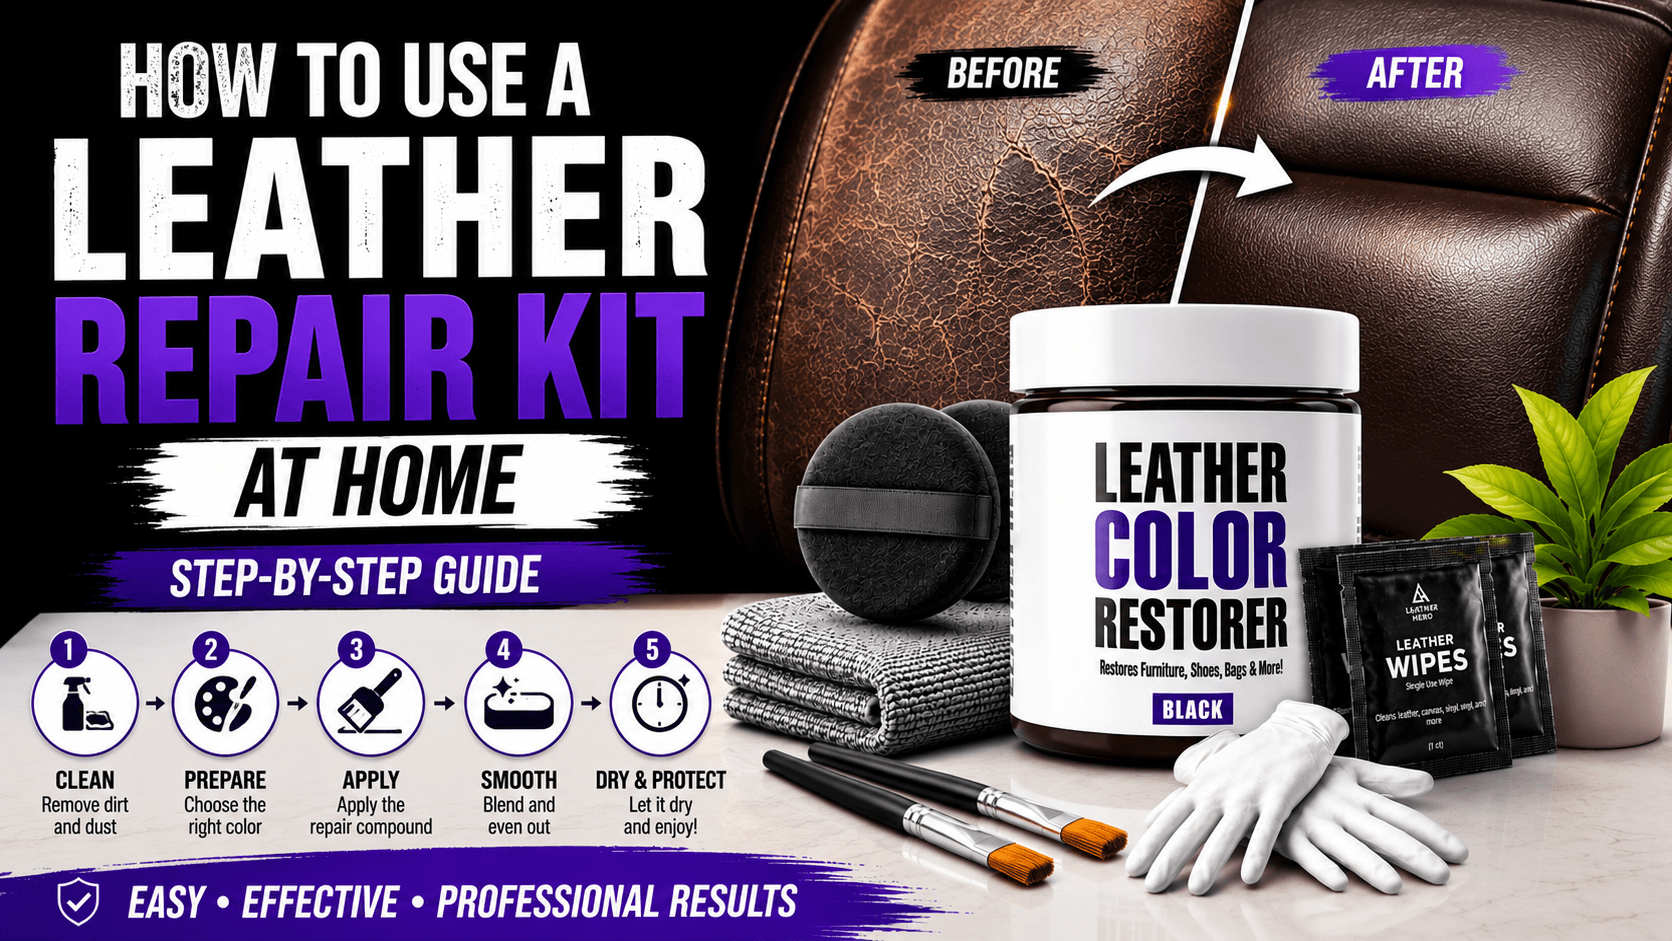
What a Complete Leather Repair Kit Should Include
A useful repair setup usually includes a cleaner or preparer, a filler or repair compound for physical damage, an applicator, a matching color product, and a top coat for protection. Not every project needs every step, but having the right sequence available prevents improvising with products that are not made for leather. The goal is to solve the actual damage instead of hiding it temporarily.
For example, a cracked couch arm may need cleaner, filler, color restorer, and top coat. A dusty leather chair may only need cleaner. A scuffed black shoe may need cleaner and color restorer, while a gouged shoe toe may need filler first. Thinking in steps makes the repair easier to plan and helps the final result look intentional rather than patched.
When to Repair at Home and When to Get Professional Help
Many small leather repairs can be handled at home, especially light fading, small scratches, worn corners, and minor cracks. Home repair is most realistic when the damaged area is small, the leather is finished smooth leather, and the color is easy to match. Black leather is usually more forgiving than complex browns, tans, burgundy, or multi-tone finishes.
Professional help is smarter for expensive designer bags, rare leather jackets, antique furniture, severe peeling, large tears, structural damage, or items where a color mismatch would be unacceptable. A repair kit can improve many problems, but it cannot make every damaged item new again. Knowing the limit of a home repair protects both the leather and your expectations.
Aftercare for Repaired Leather
After a repair, keep the area clean and avoid heavy friction until the finish has had time to settle. Do not immediately scrub or condition the repair. Wipe gently with a soft cloth, avoid harsh cleaners, and watch how the area wears over the first few uses. If the repair is on a seat, armrest, handle, or shoe, normal movement will test the finish quickly.
Maintenance should be simple: clean lightly, protect from unnecessary sun and moisture, and refresh before the damage becomes severe again. Small touch-ups are easier than major repairs. A repaired leather item will usually last longer when it is treated as a maintained surface rather than a one-time fix.
Conclusion
A good leather repair is a sequence, not a single product. Clean first, fill physical damage if needed, restore color after the surface is smooth, and protect the finish on high-use areas.
For Leather Hero shoppers, use cleaner/preparer before repair work, filler for texture damage, color restorer for faded pigment, and top coat for durability.
The best results come from choosing the step that matches the damage instead of rushing to cover everything with color. When the surface is cleaned, leveled, recolored, and protected in the right order, the repair looks more natural and is easier to maintain over time.
Match the product to the leather type, finish, and condition, then test it on a hidden area before full application.
Leather Hero Care Note
Recommended Product
Leather Hero Leather Filler Paste Kit
A focused product pick for the restoration steps in this guide.
Helpful References
Frequently Asked Questions
What is the best leather repair kit for cracks?
For cracks or missing surface, choose a repair kit with leather filler or paste before applying color restorer.
Can leather color restorer repair scratches?
It can improve the appearance of light surface scratches, but deeper scratches that catch your fingernail need filler first.
Should I clean leather before using repair filler?
Yes. Cleaning removes oils and residue so repair products can bond more evenly.
Do I need top coat after leather repair?
Top coat is recommended for repaired areas that get friction, such as seats, arms, handles, and shoe toes.
Join The List
Leather Care, Delivered.
Get expert guides and exclusive offers in your inbox.